
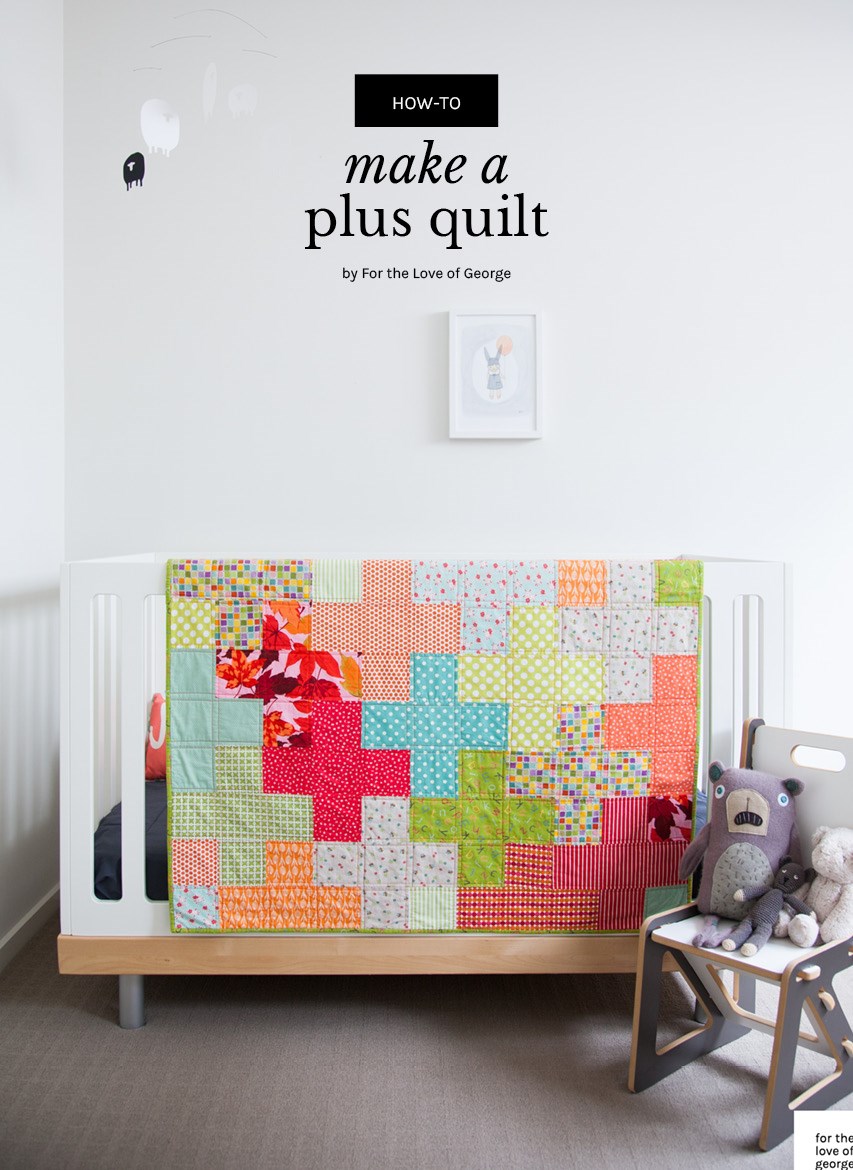
How to make a plus quilt
- Login or Register. See sidebar or visit the ‘My Account’ page.
- Download tutorial PDF. Click on the download link below. If you don’t have Adobe Acrobat Reader, you can download it here.
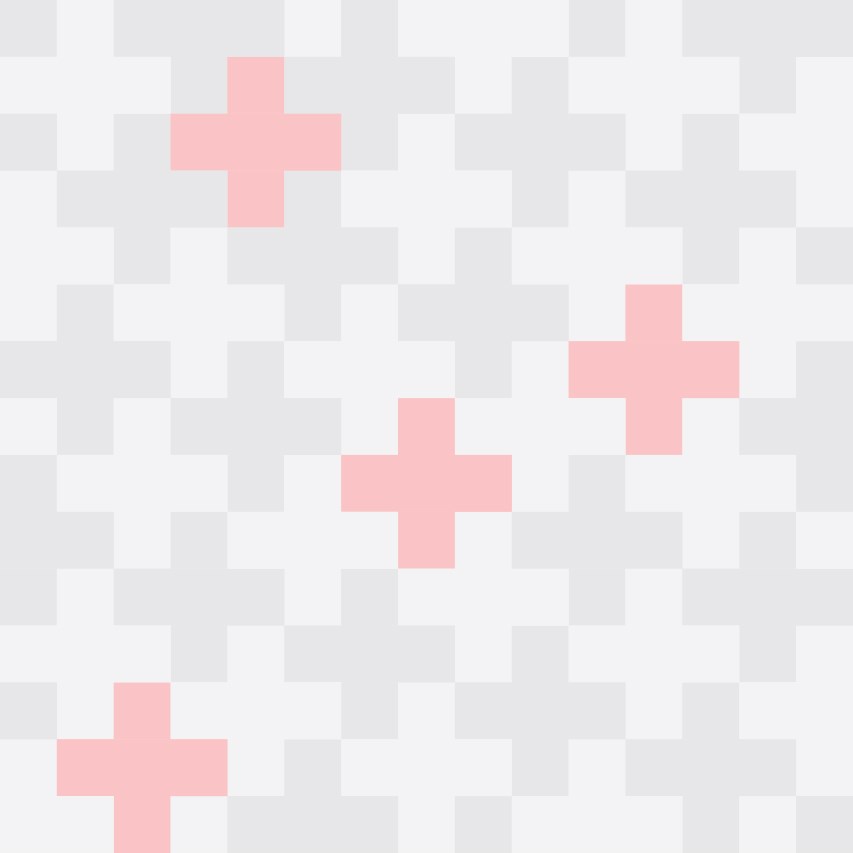
- Select your pattern. The tutorial contains two sizes and three Plus quilt pattern styles: A random layout using 9 different fabrics, a structured layout using 4 different fabrics, and graphic featured plus’s using 3 different fabrics — examples of these layouts are below.
- Choose your fabrics. The tutorial contains a blank pattern outline; use scraps of your chosen fabrics to decide on placement.
- Cut. Cutting guides are included in the tutorial.
- Sew! An accurate straight seam will ensure your plus’s align.
- Baste. Use your preferred method and batting/padding.
- Quilt. How is up to you! You could do structural straight lines, or something more free-form.
- Bind.
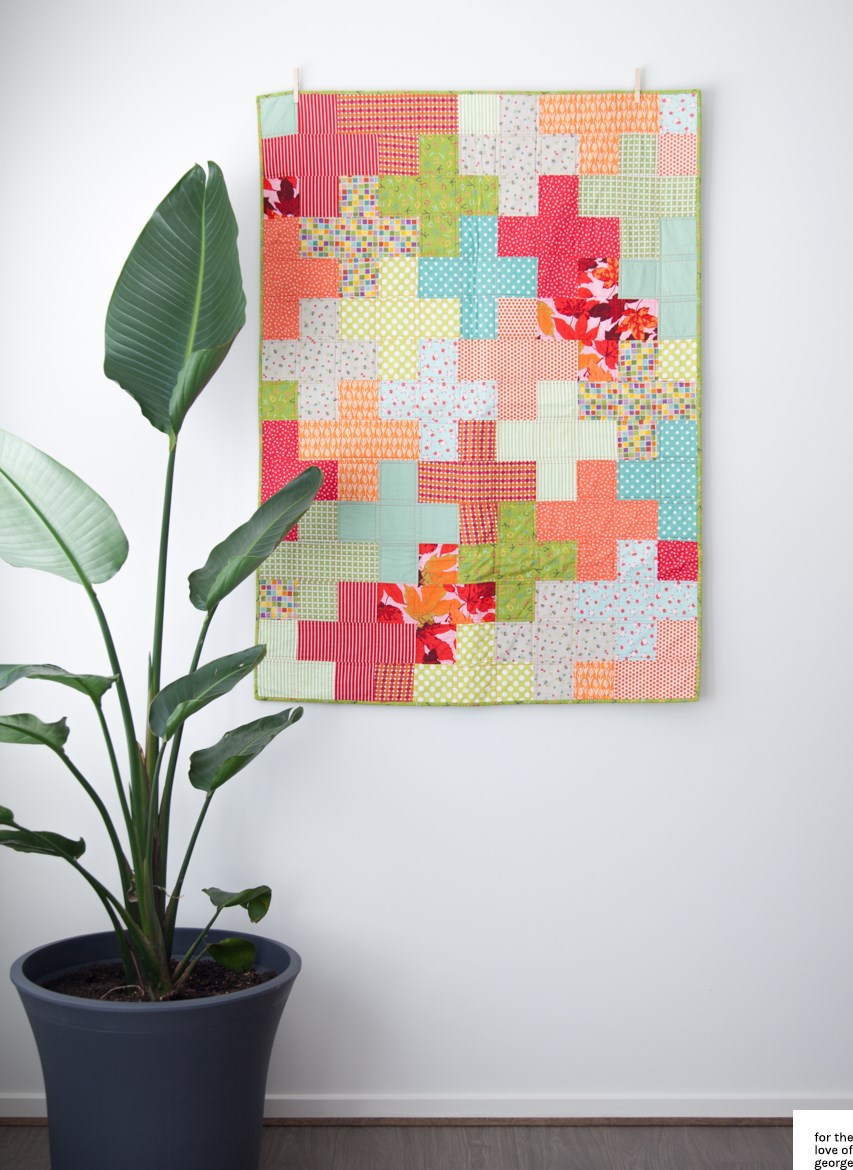
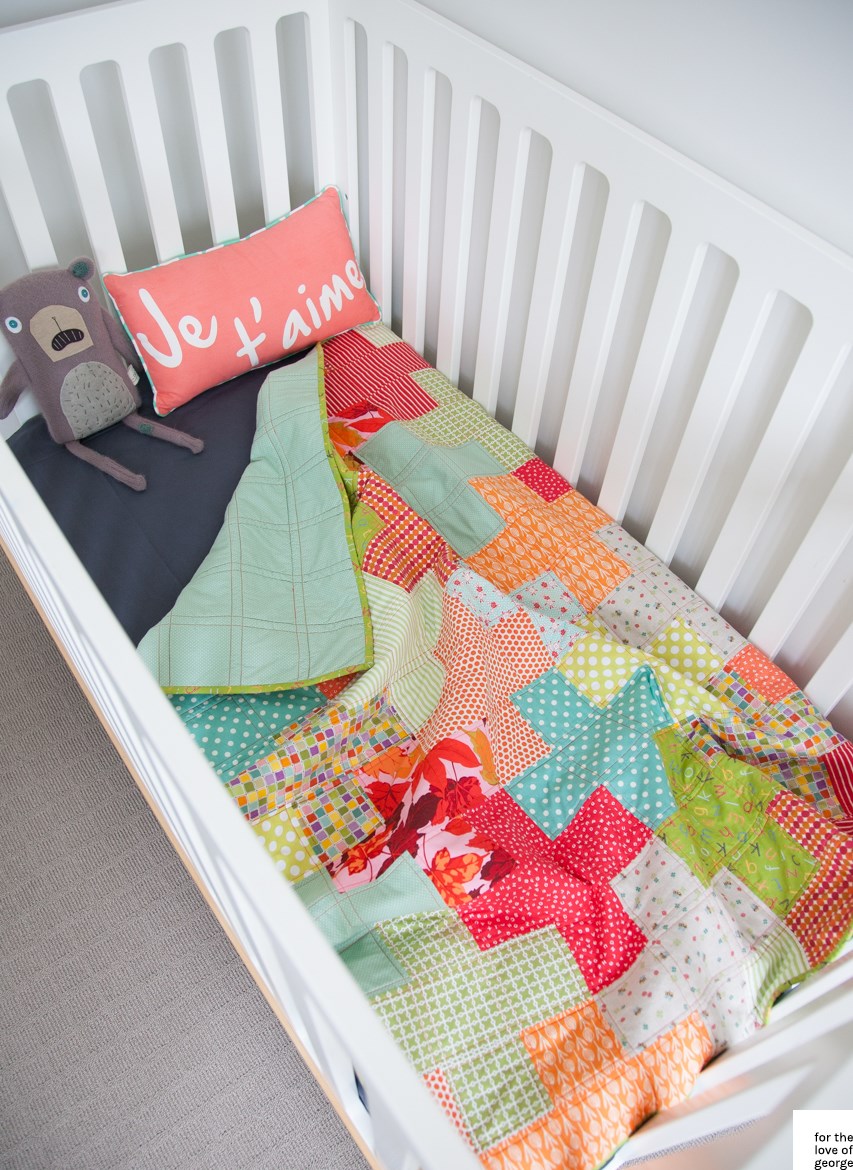
I made this lovely little quilt for my niece, Lucy. I love the way the plus symbols interlock — it looks complex but is really so very simple, you just need to cut and arrange all your pieces before you begin to sew. I’ve put together some brief instructions for you below, plus collated much more detailed info into a downloadable PDF — you’ll find the link at the bottom of the post (you will need to register download — just enter your email address in the top field in the right sidebar. Or if you’re already registered, you may log in using the fields in the right sidebar). This pattern is super easy, so will suit a new quilter, but I have assumed a little bit of knowledge (I haven’t included any instructions on pre-washing fabrics, or pressing seams, etc.), so if this is your first quilt, you may want to read up on the very basics. Or YouTube it!
Best of luck with your creation, and feel free to contact me if you have any questions — via the contact page or the comments section below. And I would love to see your beautiful quilts, too!
The details
Size: Cot quilt
Dimensions: 38 x 52″
Seam allowance: 1/4″
The pieces
Size A: 4 x 4″
Size B: 4 x 11″
Size C: 4 x 7.5″
Layouts
I have included 3 layout options in the instructions. You could use 9 fabrics and a random layout, 4 fabrics and a structured layout, or 3 fabrics with a structured background and feature plus’ — examples are below (download the PDF for detailed cutting instructions).
Option 1 : 9 fabrics with a random layout

Option 2 : 4 fabrics with a structured layout

Option 3 : 3 fabrics with a structured layout and feature plus

February 2016 update!

Queen size cutting guide and instructions now included in the download.
The details
Size: Queen quilt
Dimensions: 90 x 90″
Seam allowance: 1/4″
The pieces
Size A: 6.5 x 6.5″
Size B: 6.5 x 18.5″
Size C: 6.5 x 12.5″
Layouts
Instructions for one layout is included: 3 fabrics with a structured background and feature plus’ — example below (download the PDF for detailed cutting instructions).
Option 1 : 3 fabrics with a structured layout and feature plus
I would be so excited to see your beautiful quilts — Instagram a shot of yours (finished or in progress), ping me at @love_of_george and tag #madewithlove_of_george :)
This post was originally published on 24th March 2011, updated in July 2015 and February 2016.
| Title | Plus quilt pattern tutorial |
| Type | |
| File Size | 879.09 KB |
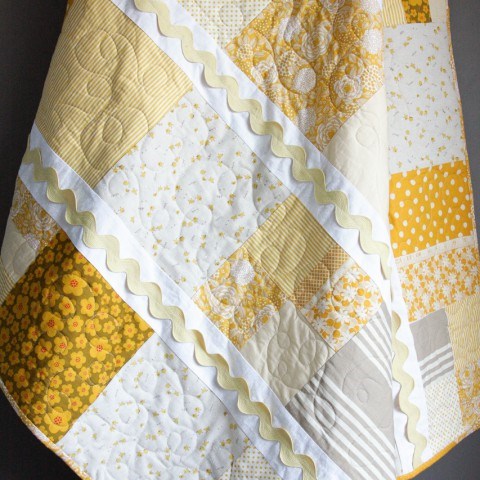 Yellow & linen chicken quilt
 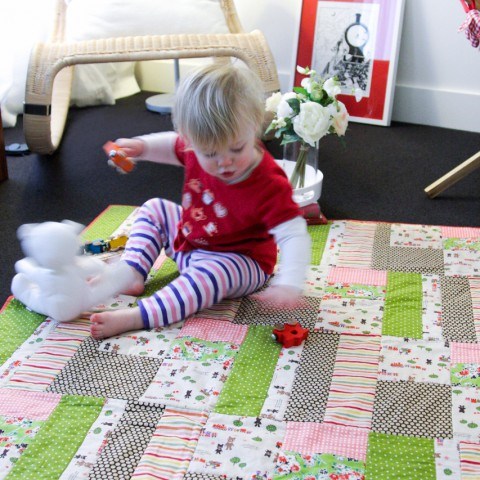 Train quilt for girls
 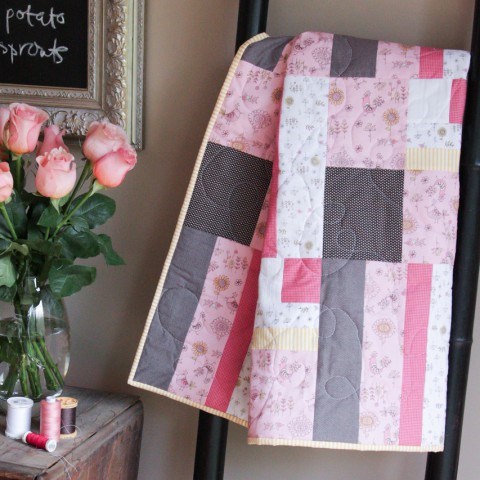 Pink little birdies quilt
 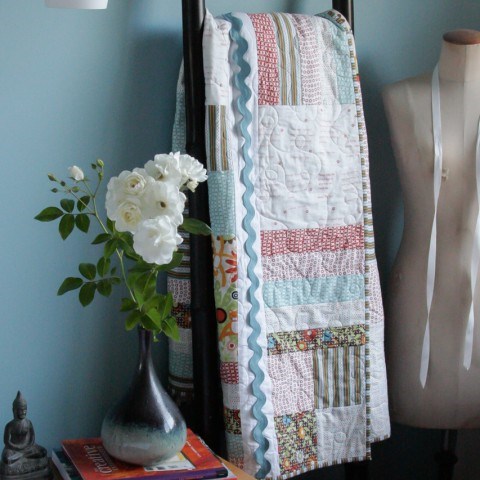 My first quilt
Margaret Dines
Aboslutely lovely: – it’s fresh, modern & so pretty for a baby girl. I hope your’e going to show us a photo of the finished quilt? How did you quilt it, eg ditch stitch?
Lauren
Hi Marg, thank you for being the first to comment on my new site! (And thank goodness it worked!) Yes, there will be a follow-up post shortly, and a couple photos of the beautiful Lucy. Stay tuned!
Eva-Marie
Saying hello form the netherlands. I’m trying your lay out as we speak. It will be a cot quilt for my son Fedde. I love your site, so modern and fresh. I’ll keep you posted on the results!
Nola
What do you have down on your table (under your quilt pieces) to protect it? Is it some kind of cutting mat? I have never seen one that large.
BTW, that is going to be an awesome little quilt!
Patti
Where do I click for the pdf?
Lauren
Hi Nola!
No, not a cutting mat, just a large thin MDF board to arrange the pieces on. My cutting mat is much smaller!
Cheers, Lauren
Nada
Such a fresh inviting quilt plan. I clicked pdf and my mind is already building this sweet quilt. What a great world we live in to be able to write to someone far away over coffee and cereal. I am in Memphis Tennessee. We are more alike in our world than different. Thanks for sharing your ideas!
Lauren
Hi Patti,
You can download the PDF by clicking on the colourful right image above (the one with the black lines showing each fabric piece). I will send you an email too!
Cheers,
Lauren
Lauren
Hi Nada, Yes! What a wonderfully small world we now live in. So glad you popped by and took the time to say hello! Would love to see the fruits of your labour — drop me a line when you’ve finished your ‘plus’ quilt :)
Katie
I know you give the dimensions of each fabric size and how much, but do you have an estimate of how much fabric you might have used? I want to start buying now and saving fabric pieces but i’m unsure how much I’ll need in the end.. Any idea? By the way It looks so great thank you for this pattern! I saw the posts of a plus quilt but wasn’t quite sure how it was put together.
Lauren
Hi Katie, I am so hopeless when it comes to buying fabrics — I always buy too much! I fear running out before my project is finished, and I figure I’ll use it all up at some point. How much you buy depends on how many different fabrics you choose to use in your design (I think I used 15 from memory). And because each of the pieces are relatively small, you can easily make it by using scraps. If I’m forced to use a little maths (it’s not my strong point), I’d say you could get away with buying 10″ or so of each fabric (assuming it’s a standard width of 45″). I hope this helps a little! Cheers, Lauren
Bethany
wow, this is gorgeous! im am so jealous! you have inspired me to get quilting again! <3!
Anne
I love this! I’ve never made a quilt before, but I’ve wanting to give it a try, and I think this is a pattern I could handle!
Lauren
Hi Anne,
I’m so pleased you like this quilt and have decided to give it a try! Be warned, making quilts quickly becomes addictive! I would love to see the fruits of your labour, be sure to drop me a line when you’re finished :)
Cheers,
Lauren
Elena
Hi there Lauren, Wow what a beautiful quilt. I too have seen this in magazines, and now I know how thanks to you :) I live in New Zealand. I was wondering how you quilted your quilt? Many thanks for the inspiration to get me going.
Lauren
Hello Elena, and welcome! Thank you for your lovely comment. I quilted by machine-stitching a quarter-inch on either side of the seam line. You can see how it turned out on the post: welcome, lucy nina. I’m heading over to New Zealand in February — I’m a bridesmaid to my best friend who is living near Wellington. I can’t wait! Best of luck with your quilt! Cheers, Lauren
sandy sanders
this looks great for my 19 year old daughter but would like to make it in queen size. how do you think it would look and what amount of fabrics and how many pieces?? any ideas?? sandy
Lauren
Hi Sandy,
I’ve just created a new downloadable PDF for you — it has all the fabric estimations and cutting sizes you need to make the ‘plus quilt’ in a queen size. Good luck! Cheers, Lauren
EmilyKate
Thanks for these printables! Not sure how I haven’t come across your blog before, it’s lovely :o)
Lauren
Thank you Emily Kate! I’m glad you stopped by and commented, because now I have found your beautiful blog, too! xo
Tui
Is this quilt fat quarter adaptable? I have a bunch (nine or ten different prints. would that be enough for the crib size?
Lauren
Hi Tui,
Hmm, good question! It’s definitely do-able, but I suggest you work out how you are going to lay out your design before you start cutting — because you will need to get two size 1’s, and one size 2 or sometimes a size 3, to make up a ‘plus’. Based on my calculations, you need at least nine fat quarters to make a cot quilt size. Just be aware though, you may need to rotate a print to get the most number of pieces out of each fat quarter. I hope this has given you the confidence to give it a go, I’d love to see the result!
Cheers,
Lauren
Lisa
Hi Lauren,
Do you have the dimensions/instructions for a twin size quilt? Love it!
Thanks
Lauren
Hi Lisa, I’m so pleased you love the quilt :) No, I haven’t yet worked out the dimensions for a twin size, but leave it with me. Cheers, Lauren
Sue
what a cute quilt. What fabrics did you use? thanks for the directions…
Belinda
Hi Lauren. I found your gorgeous quilt design via Pinterest and loved it. Thank you for being so kind and supplying a pattern so that I didn’t have to try and figure it out myself. For a quilter I’m not much good at the mathematical parts ! I plan to make mine mostly white with bursts of orange shades.
Deb
Oh I love this quilt, am going to make it from my scraps … will put it on my list of things to do, thank you for sharing this pattern. So glad I found your blog, I love it!!! Cheers, Deb
CIndy G.
I came across your pattern on the Little Birdie Secrets blog, and it looked like a simple enough pattern for a newbie quilter like myself. She made hers in solids, which I loved, but I’m happy to report that I also love how it looks with prints, so hopefully I can use some of my FQ stash :) Thanks for so generously sharing your pattern!
Jessica
I’m making this quilt right now! It’s my first quilt ever! Thanks for the pdf!!! Love your quilt!
Lauren
Oh wow, the Little Birdie Secrets quilt and blog is gorgeous, thanks for sharing Cindy. Good luck with your quilt! Cheers, Lauren
Lauren
Yay, good on you, Jessica! Best of luck! Cheers, Lauren
Jessica
Thanks Lauren! I just finished the quilt top! Did you draw lines to guide you for quilting the straight lines or did you eyeball it?
Lauren
Hi Jessica, Wow! That was quick! Well done :) Hmm, good question. For the most part, I was able to use the seam and my quarter-inch foot as a guide, but for those areas where there is no seam, you could benefit from a ruled pen line with washable ink. Good luck! I would love to see it when you’re done :) Cheers, Lauren
Rori Jensen
Hello Lauren, I just came across your Plus quilt pattern
and blog….oh my, such loveliness! I have a couple of quilts in
progress, an Impromptu Quilt along on Flickr (whoawie), Bonnie
Hunter’s Easy Street, just to name a few, but I can’t wait to make
this adorable baby quilt. Thanks so much for your
generosity.
Kathryn
This may sound absolutely silly, but I have never made a quilt before. When you “bind” the edges, how do you do that?
Lauren
Hi Kathryn, that’s not a silly question at all! I learned how to bind by watching a video my mother-in-law gave me, so it’s not hard to do! If you search for ‘how to bind a quilt’ on YouTube, you’ll find a huge number of tutorials. I think this one looks quite thorough: https://www.youtube.com/watch?v=-GVA05MxXTU … There are a few steps, so take your time and go slow. I love the final stage of hand-stitching the binding, it’s something you can do in front of the telly, and it makes the quilt look so lovely! Good luck :)
stephanie
So cute! Thanks for the tutorial/pattern.
Nora Montgomery
I am making this pattern and encourage everyone to be rigidly organized. I numbered each row as I sewed it and put it on the design wall. That was the only way I could make sure I was sewing the correct rows together.
Another suggestion: Be sure when you are sewing the rows together that you line up the seams of the top and bottom of the “plus” (rather like you do when you are sewing a sash on and making sure the blocks line up). If you aren’t very careful, your “plus” will not be totally centered.
This is for my fourth great-granddaughter — lots of work; only hope her mother likes it.
Lauren
Great tips, thank you Nora!
Susan
This is so great, I love that it is so adaptable for boy or girl. I do lots of charity quilts, this will be perfect. Thank you for sharing your pattern. It is much appreciated. Susan
Janet
I’ve never made a quilt before, although I’ve been sewing for 50 years, but this may be my first! It’s absolutely beautiful!
Lauren
Oh you will find it a breeze then, Janet! Enjoy :)
Deb Donovan
Thank you so much for this download, I’m going to give it a go over the Christmas holidays, cheers. Deb :)
laurel
okay, this might be helpful to someone else, but I counted how many of each square there were in the cot size, to help plan cutting… my chart goes color, size of piece, how many needed.
Turquoise 1 5
Turquoise 2 2
Dark Red 1 4
Dark Red 2 2
Lipstick Red 1 4
Lipstick Red 2 1
Lipstick Red 3 1
Taupe 1 7
Taupe 2 3
Orange 1 7
Orange 2 4
Hot Pink 1 7
Hot Pink 2 2
Hot Pink 3 1
Teal 1 7
Teal 2 2
Teal 3 1
Lime Green 1 8
Lime Green 2 3
Baby Pink 1 4
Baby Pink 2 2
Navy 1 4
Navy 2 1
Navy 3 1
Royal Blue 1 6
Royal Blue 2 2
Royal Blue 3 1
Kelly Green 1 6
Kelly Green 2 2
Kelly Green 3 1
Debora Ryzlak
Hi there, I love this quilt and my daughter had twins so i am going to have a bash at making two of them :)
Is there anywhere where I can find the complete sewing instuctions? It would be very helpful as I am not an advanced quilt maker.
Many thanks and love your blog