

What you’ll need to decorate
Cake fence
- Mini popsicle sticks
- Long strip/s of balsa wood
- Metal ruler
- Stanley knife
- Cutting board
- Hot glue gun and glue sticks
- Non-toxic paint in your choice of colour (I used dove grey)
- Paint brush
- Floristry wire
Garden markers
- White fondant
- Fondant mat
- Fondant rolling pin
- Ruler
- Fondant cutter
- Black gel food dye
- 3mm metal punch letters
Fondant rabbit
- White fondant
- Fondant shaping tools
- Toothpicks
- White, black and coral gel food dyes
- Fine paintbrush
- OR a food-safe black dye pen
Plus
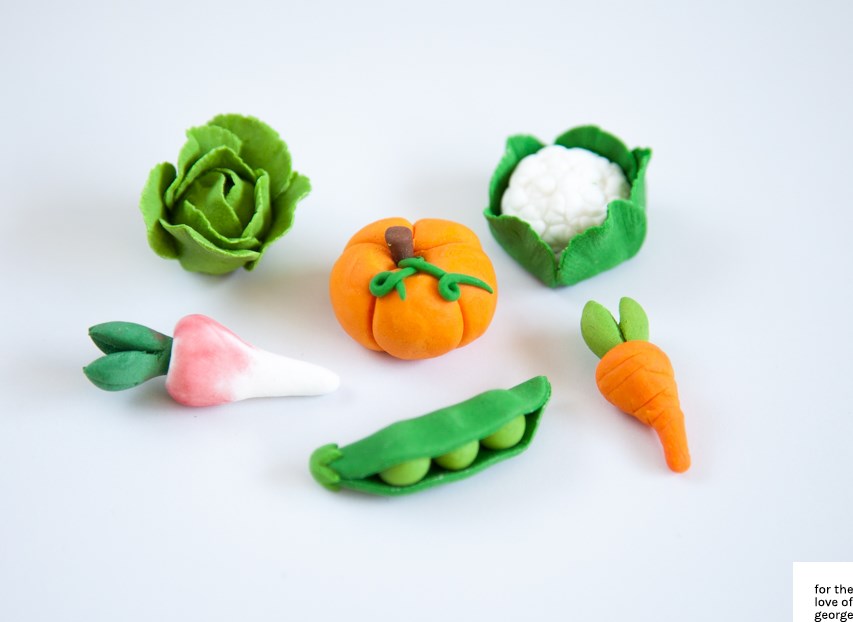
- Sugar vegetable decorations (I got mine from this eBay seller, if you search for ‘sugar vegetables cake decorations’ you should be able to find some in your area/country)
- 10-inch square cake tin (cake recipe to follow)
- Chocolate ganache (recipe to follow)
- Chocolate soil (recipe to follow)
- Pistachio and honey ice-cream, to serve (optional)
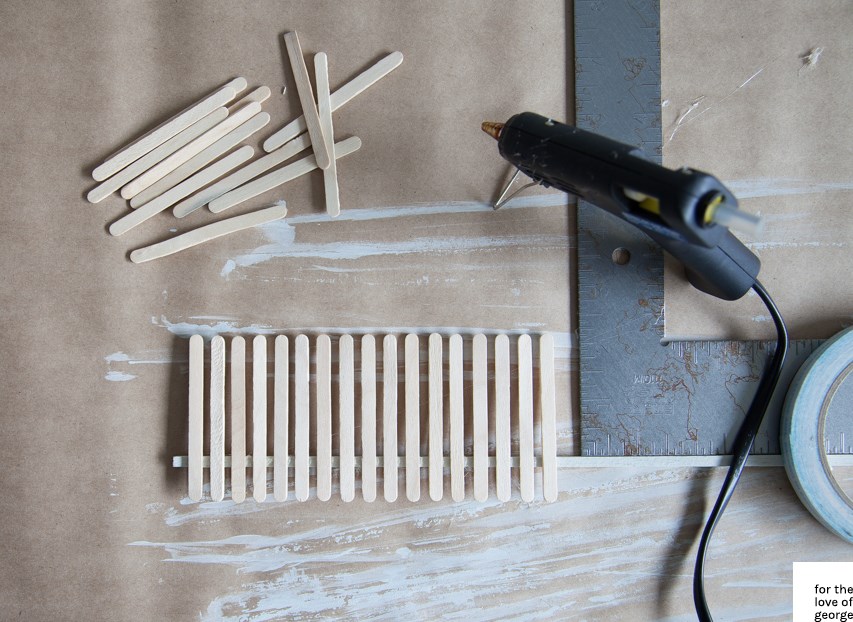
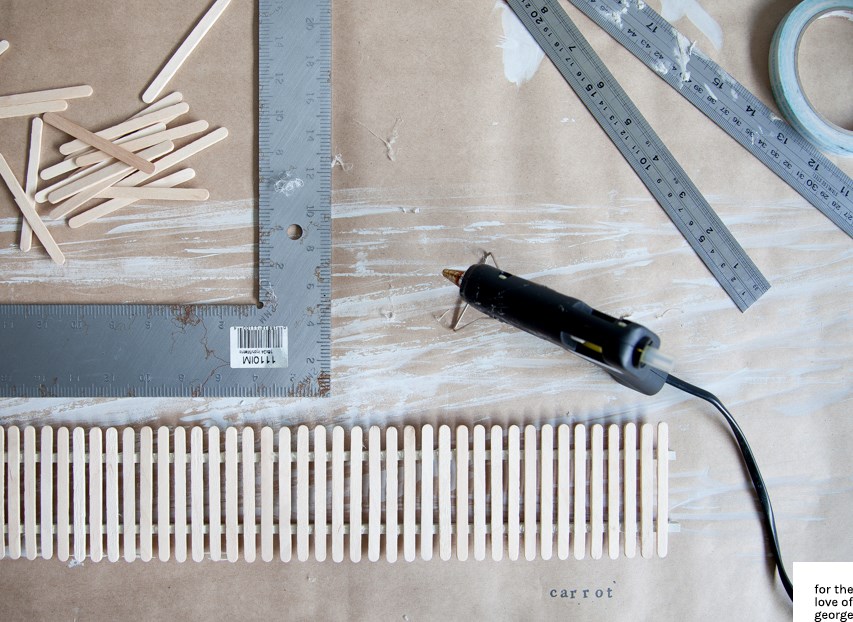
To make the fence
The piece of balsa wood I purchased was too thick, so I split it into four slender lengths using a metal ruler and a sharp stanley knife. I then painted these with a dove grey non-toxic paint. When the paint was dry, I began to assemble. Using a hot glue gun and a set square, glue each mini popsicle stick to one strip of balsa wood, ensuring they are evenly spaced as you go. When you’ve done the entire length of balsa wood, glue on the second, adding a little dab of glue to about four or five posts at a time (the hot glue will set too quickly if you try to do more than that). You are then ready to paint. When the paint is dry, cut your fence into cake-sized lengths. I waited until my cake was baked to do this, so I could cut the perfect fit.
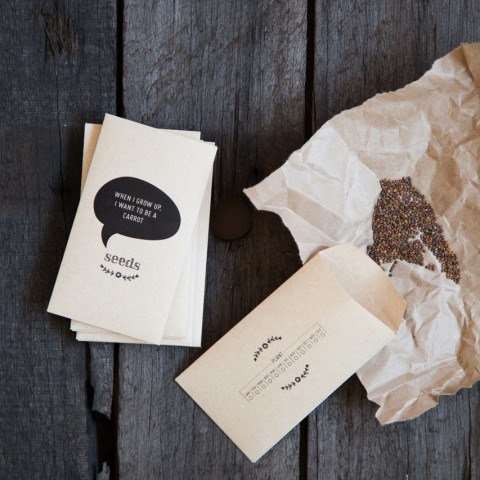
Making the garden markers
Prepare your metal letters by giving them a good clean (they will probably have a little oil on them). Mix a little black gel food dye into your white fondant to make a soft grey colour. Knead in a little icing sugar to make the fondant a little firmer, then roll out on a fondant mat to a couple millimeters thick, using a fondant rolling pin. Using a metal ruler and a rolling fondant cutter, cut 8mm-wide x 15cm-long strips. Using relatively gentle pressure, press the letters of your chosen vegetables into the fondant. Carefully transfer to a safe place (out of direct sunlight and avoiding high humidity and moisture) to dry.
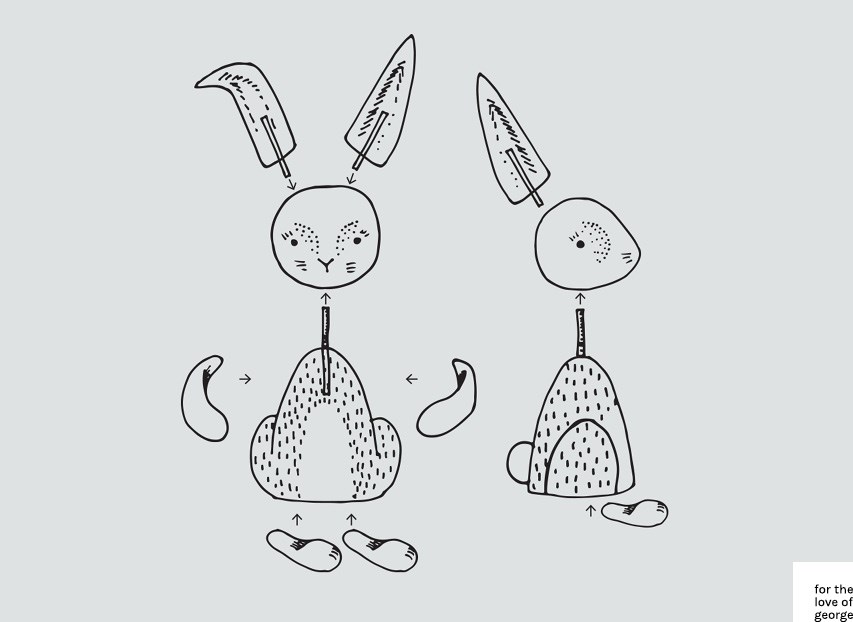
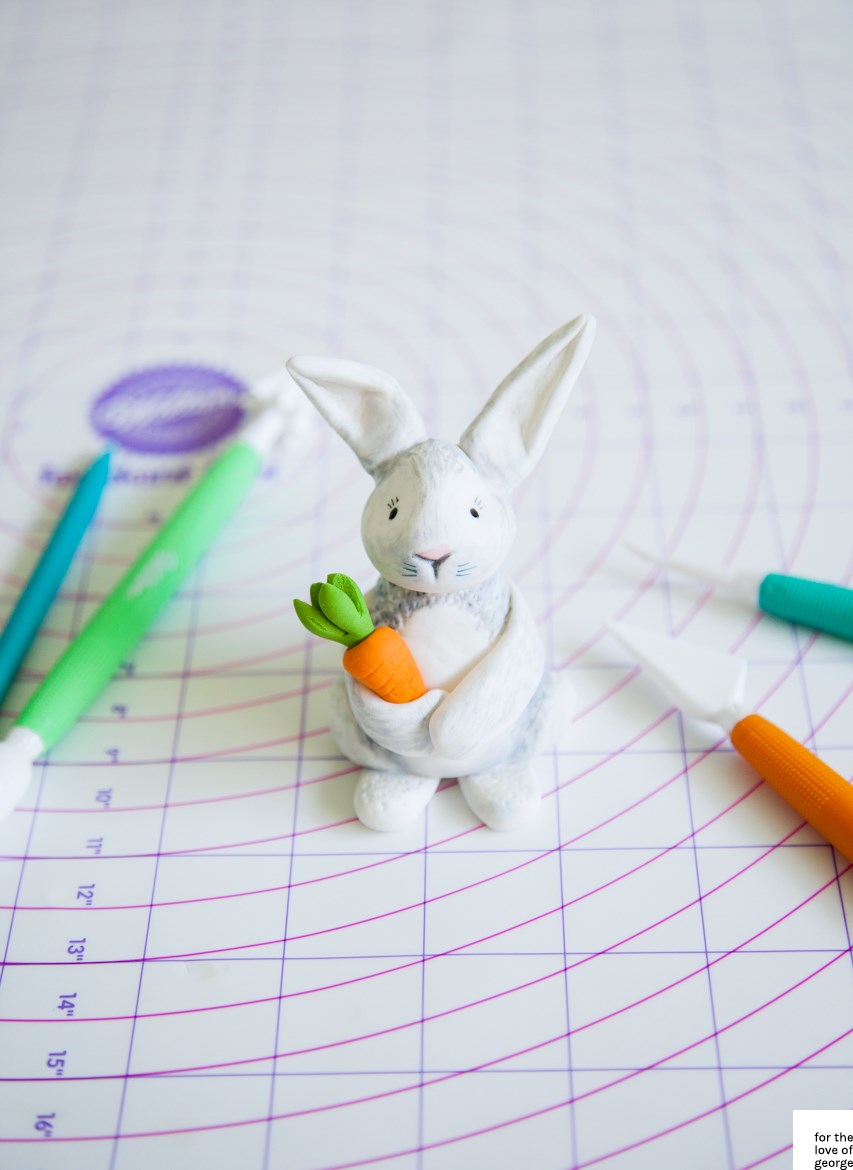
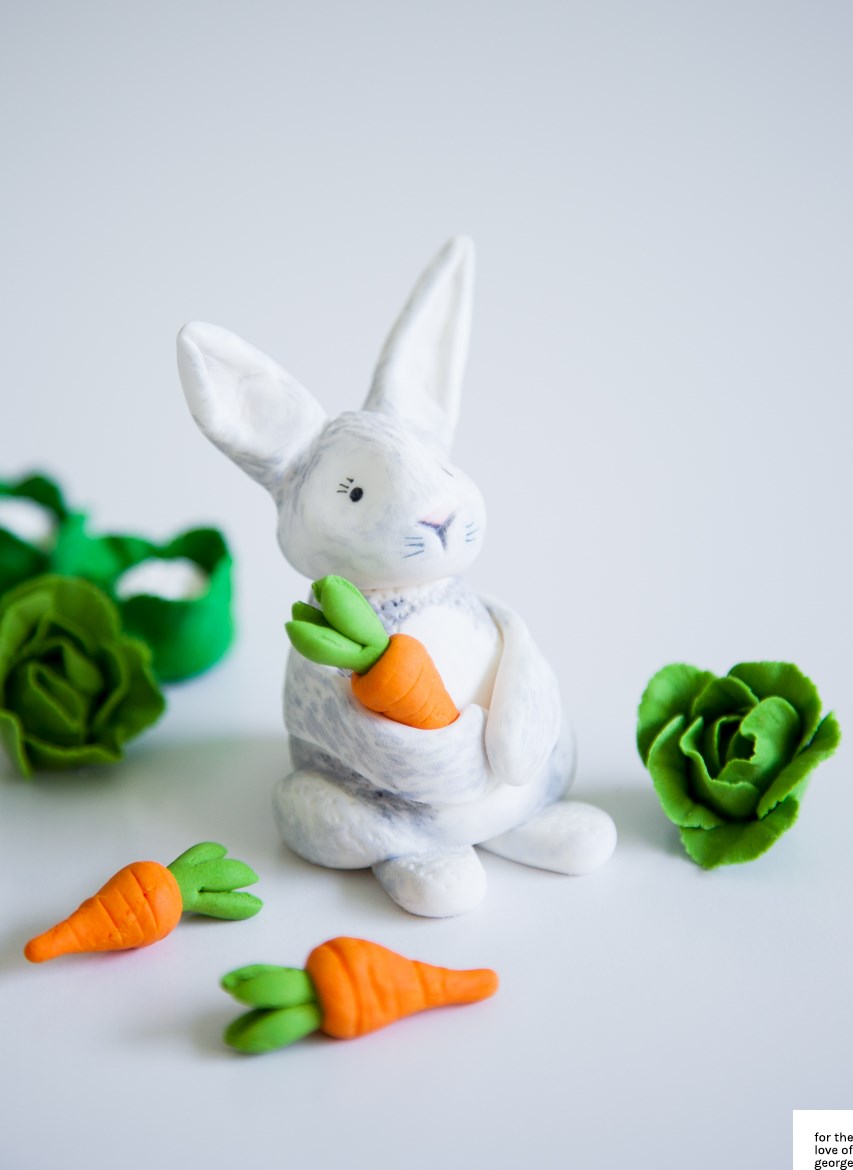
Making the fondant rabbit

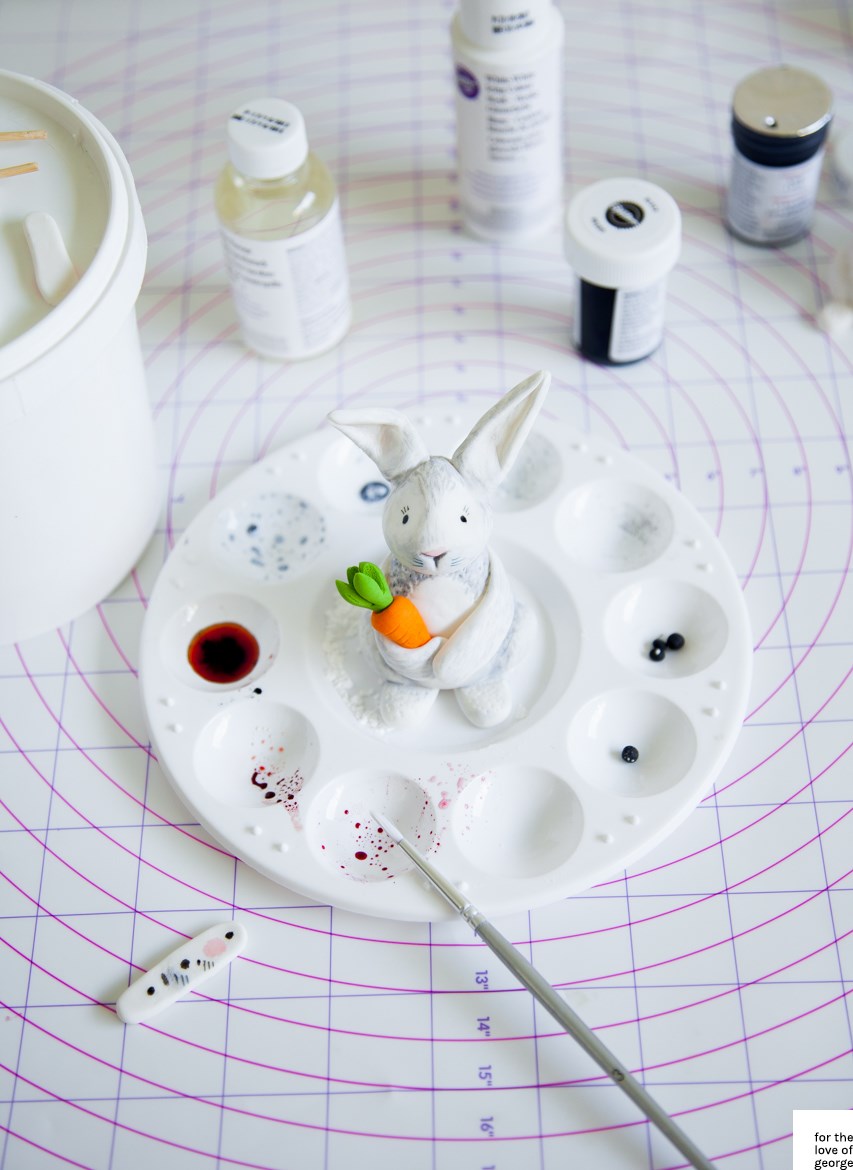
This task was honestly a bit of trial and error. I’ve never worked with fondant before, so I really just winged this. If you feel like this is a bit beyond you (seriously, if I can do it, you can too), then feel free to buy this little addition, instead of making your own. I started by kneading icing sugar mixture into my white fondant, to make it a bit firmer and easier to handle. The rabbit is basically constructed with two feet, the main body (shaped with a heavy bottom and coming to a point at the top, with legs moulded from the main piece), the head (which is attached to the body with half a toothpick), two ears (more toothpicks), and two arms. I then made little scratchy impressions to give the look of fur, then painted all over with small strokes in a soft grey (made by mixing black and white gel food dye). A soft coral-coloured nose, a dab here and there for two eyes, and a couple of whiskers — and voila! — all done.
Recipe
Chocolate buttermilk cake
2 cups (500ml) water
250g butter, chopped
70g cocoa, sifted
4 cups (600g) plain flour, sifted
2 tsp bicarbonate of (baking) soda, sifted
4 cups (880g) caster sugar
4 eggs
1 cup (250ml) buttermilk
2 tsp vanilla extract
Preheat oven to 160°C (320°F). Place the water, butter and cocoa in a saucepan over medium heat and stir until the butter has melted. Place the flour, bicarbonate of soda and sugar in a bowl, add the cocoa mixture and whisk to combine. Add the eggs, buttermilk and vanilla and whisk to combine. Pour mixture into a lightly greased and lined (with baking paper) 10-inch square tin. Bake for 90 minutes or until cooked when tested with a skewer. Allow to cool in the tin for 10-20 minutes. Turn out onto a wire rack to cool completely.
Using a sharp knife, trim off risen portion from the top, so that you’ve got a nice flat cake (no need to trim off right to the edges, it will be upside down, so you won’t see it anyway). Flip cake over (top on the bottom) onto a cake board to decorate.
Ganache
250g dark chocolate, chopped into small pieces
150ml pouring cream
10g sugar
30g butter
Heat cream and sugar in a saucepan until hot (not boiling or it will split). Pour over chopped dark chocolate and stir until chocolate has completely melted. Stir in chopped butter until glossy. Allow to cool completely before use. Use a spatula to cover cake. If you smooth out your edges last (do the top of the cake first), you can create a little lip to hold your chocolate ‘soil’ crumb.
Chocolate soil
60g caster sugar
60g (1¼ cups) almond meal
35g (½ cup) plain flour
25g cocoa powder
pinch of sea salt flakes
30g unsalted butter, melted
To make the chocolate soil, preheat the oven to 150°C. Combine the dry ingredients in a bowl, then stir in the melted butter until the mixture looks mealy. Spread over a lined baking tray and bake for 10-15 minutes, stirring occasionally. Cool, then store in an airtight container until ready to use. If you have any leftovers, sprinkle liberally on vanilla ice-cream for a quick dessert – yum!
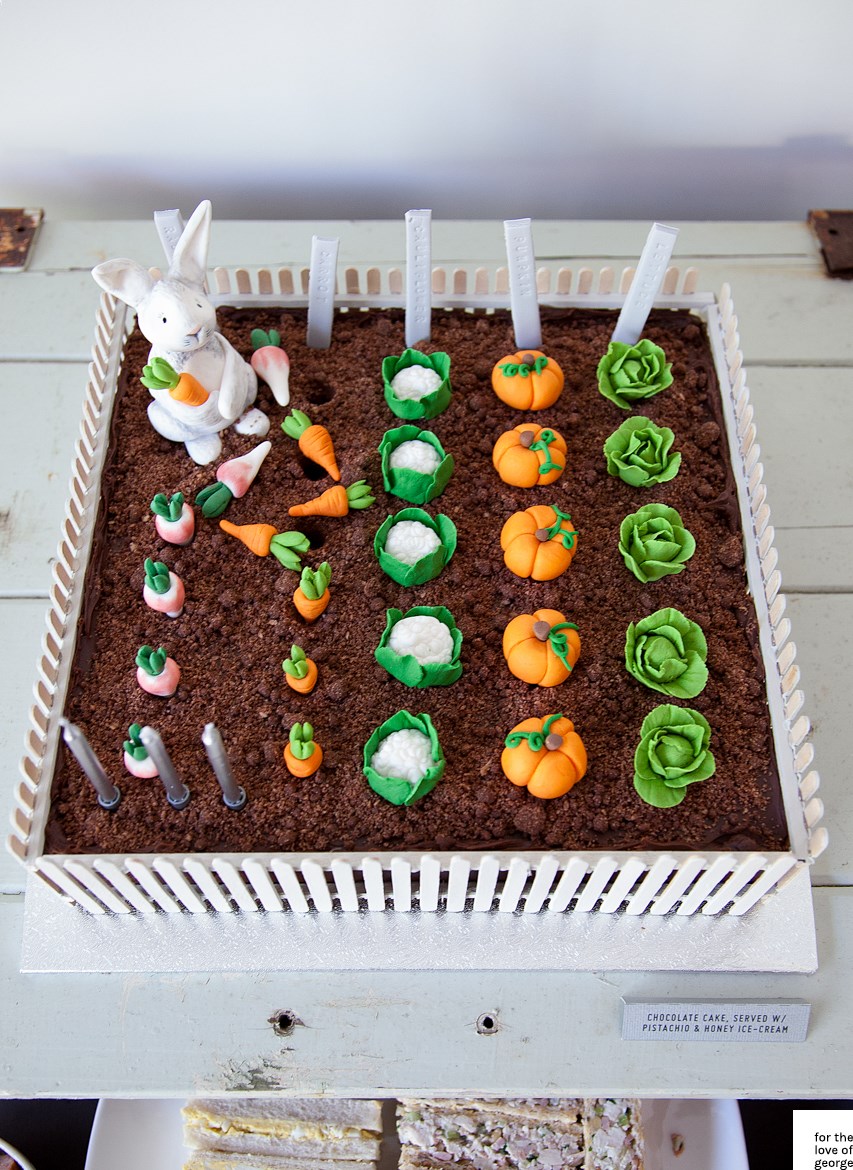
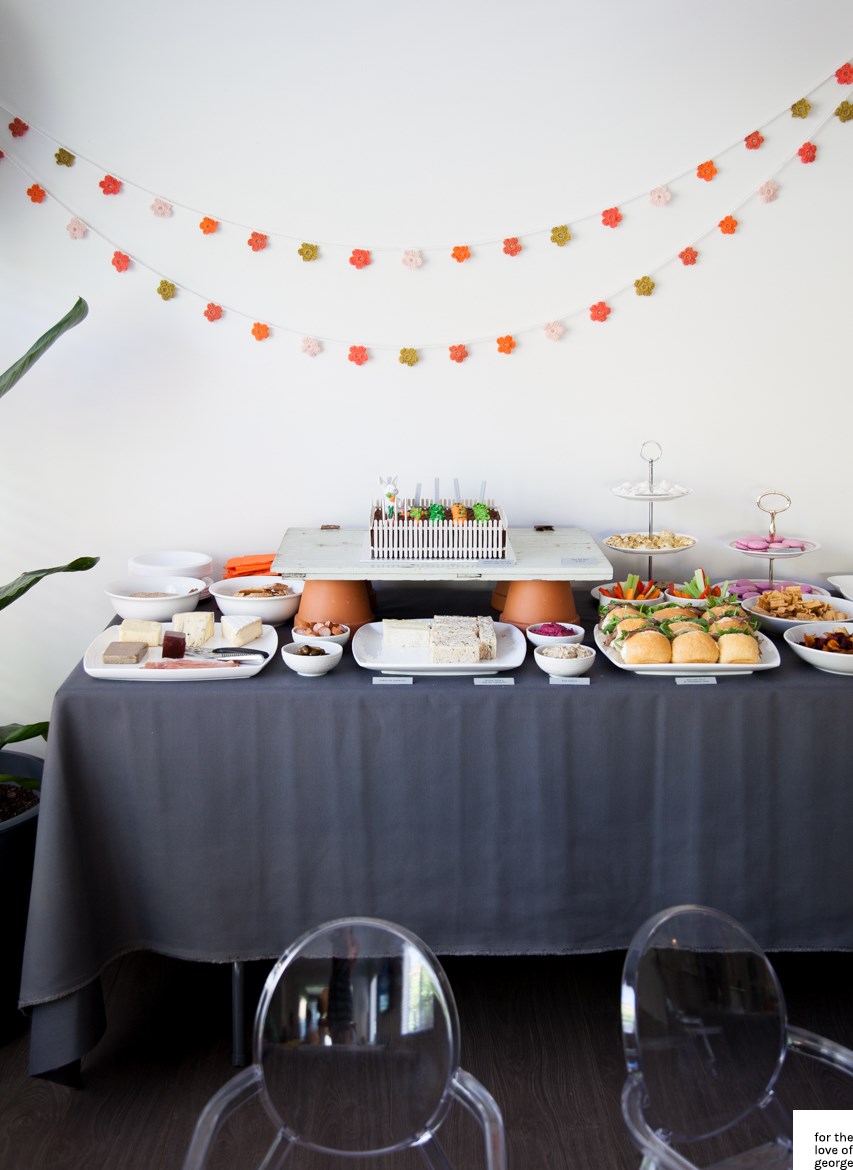
Once your cake is ready, and you have applied the ganache and chocolate soil, secure the fence to the sides of the cake by bending a U in a short length of floristry wire, and inserting into the cake around the balsa wood (just one at each end should be plenty). Position your fondant rabbit on top and place your sugar vegetables in rows. Using a fondant tool, make several holes in the carrot and radish rows to emulate where the veggies have been pulled from the soil by the rabbit. Gently push your fondant garden markers into the cake at the back of your veggie rows — don’t try to be too straight, they look more natural at different angles.
And that’s it! I hope your little bunny-lover loves it as much as mine did!
View our recipe conversion guide for further hints and tips.
 Seed packets
 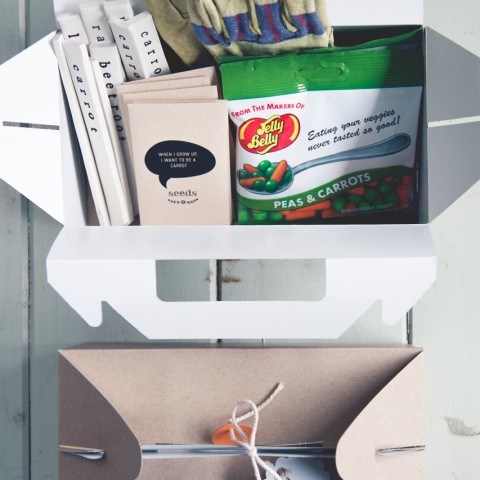 Rabbit vegie patch party
  Macaron mania
  Guess baby’s birth stats
Eve
Hello Lauren, I love love love this! I am doing something like this for my son’s birthday. He loves Peter Rabbit. May I please ask where you got the peas and carrots jelly beans from? I am in Sydney so probably will have similar stores (if you got it from a major/chain store). Thanks very much. I’m excited now!
Lauren (blog author)
Hi Eve! I got mine from Moo Lolly Bar, but they don’t appear to have them in stock anymore. I did a quick Google search for ‘Jelly Belly Peas Carrots site:au’ and found Tom’s Confectionery Warehouse sells them. They’re not terribly easy to find in Australia, unfortunately! Good luck :)